

In this article I will show you how to add a blog post in WordPress. The basic steps are:
- Sign in to your WordPress Dashboard (Administration Panel)
- Click on the ‘Posts’ tab
- Click on the ‘Add New’ tab
- Start filling in the fields – post title in the upper field, article (post) content in the main editing area below the title
- To the right of the editing area you can choose a category for your post, add tags and a featured image
- When you are done, click Publish
The WordPress Dashboard (Admin Panel)
The first thing you want to do is log in to your WordPress Dashboard, which is also called the administration panel. To do this, simply add /wp-admin to the end of your URL where you installed WordPress. If your site is called mybusiness.com you would type the following into your browser mybusiness.com/wp-admin.
Type the username and password you used when you installed WordPress. This will bring you to your Administration Panel (Dashboard) which will look like this.
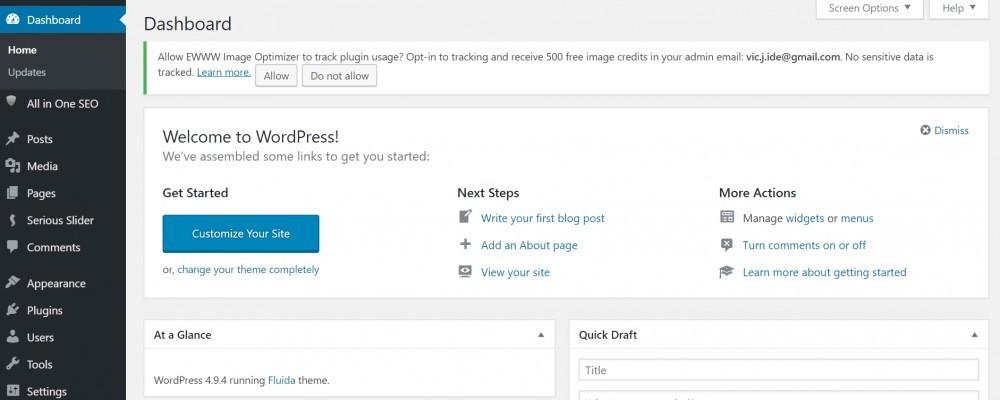
The dashboard is the first screen you will see and it is designed to give you an overview of how your website or blog is doing. It gives you a birds-eye view of your site and helps you navigate to other areas of your site. On the left side is your navigation area which is where we will start.
Add A New Post
Click on ‘Posts’ on the left side of your dashboard. Then, click on ‘Add New’. This will bring you to the screen where you will write and publish your new post or article. You should now be at a screen that looks like this.
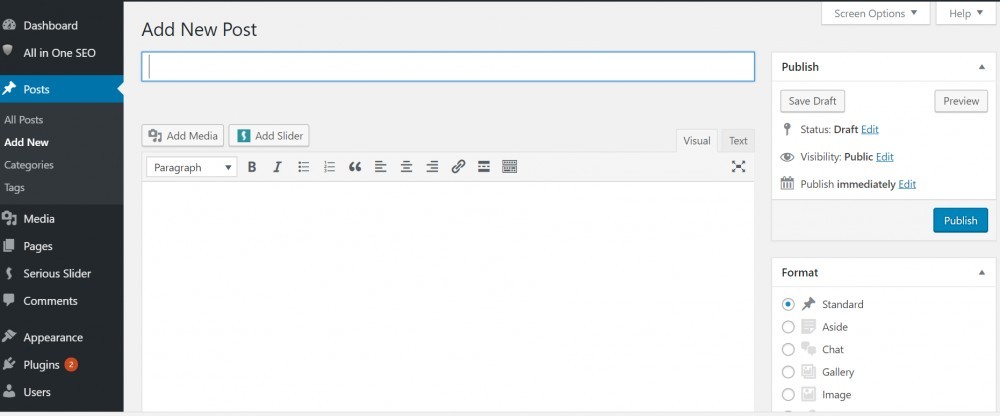
This ‘Add New Post’ page is divided up into 3 general areas. The main section is where you will write your blog article and consists of the section at the top where you put the title of your blog post and the large area below where you will write your content. The second section is to the right and is where you will add categories and tags to help organize your post. This is also where you can add a featured image and publish your post. The third area is below the post content and, since this is a screenshot, you can’t see it on this image. This is the area where, if you have an SEO plugin installed (like Yoast SEO or Alll-In-One SEO Pack), you will be able to add some post snippets and keywords to help search engines find your post better. It’s the SEO stuff!
Write And Format Your Content
Now you can start filling in the fields that will actually create your blog post, which basically means start writing!
Title
Start at the top with the title of your blog post. The title is important. Not only does it grab your reader’s attention and get them to want to read the article, the title is one of the first things search engines like Google use to find your content and hopefully put it on the first page of the search results. So, think carefully about your title and make sure it describes what is in your blog post but also grabs your reader’s attention.
Main Content
Below the title is the section where you will write your article. It is designed basically to mimic a Microsoft Word document. It uses the WYSIWYG format which stands for ‘What You See Is What You Get’. As you write your content you can use the formatting tools at the top of the content area to format your article. Again, very similar to Microsoft Word. You can bold, italicize, underline, indent, and create lists to name a few of the formatting options.
Formatting Toolbar


Headers – On the left side of the formatting bar you will see an arrow next to ‘paragraph’. If you click on that you will see several header sizes, Heading 1 – 6. You can use these to organize your content and make it look visually appealing.
Formatting – As mentioned above, you have several other formatting options in the formatting bar, including bold, italic, lists, etc. I do want to point out a couple of the items on the formatting bar. The first one is the image that looks like a link in a chain. This is the tool you use to create a link to another website or URL. To do this, you would highlight the word you want to add the link to, then click on the ‘link’ image in the toolbar, and add the URL to the website you want to link to. Then, click save.
The other thing I wanted to mention is the ‘toolbar toggle’ button at the end of the formatting toolbar. Clicking on that will open up some more formatting options.
Add Media – Above the formatting toolbar is an ‘Add Media’ button. This is how you add images, videos and other media to your blog post. Simply place your cursor where you want to add the image or video and click on the ‘Add Media’ button. If you already have the image or video uploaded it will be in your media library and you can select it. If not, you have the option to upload it from there.
Visual / Text Editor – The final thing I want to bring to your attention is the two tabs above the formatting toolbar to the right. You have two options when writing and formatting content for your post. You can use the Visual Editor which is pretty much what it sounds like. What you see is what you get and works like a Microsoft Word document. You can also use the Text Editor tab but you will need to understand HTML code in order to do so. When you click on the Text Editor you will see the content of your blog but you’ll also see the HTML code. So, unless you know HTML code, I would stick to using the Visual Editor.
Getting Ready To Publish
Now that you have your article written and formatted, let’s take a look at the area to the right of the visual editor. This is where you can view and change the publishing status of your blog post, add categories and tags to help organize your content, and add a featured image.
Publishing
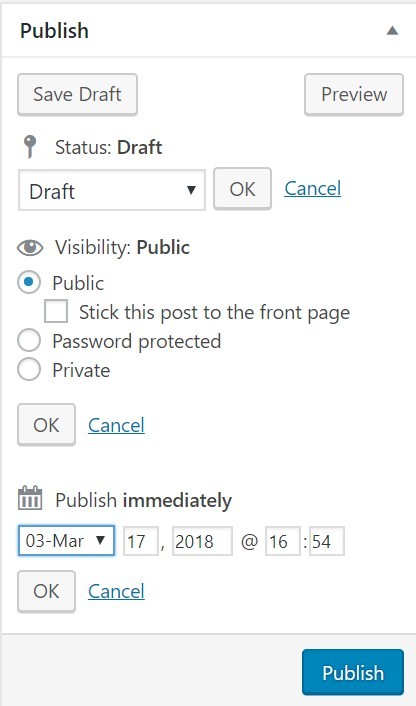 The first area is where you can save a draft of your post, preview your post before you publish it and manage how your post will be viewed by the world. I have expanded each section so that you can see the different options.
Save Draft – Click on this button to save a draft of your blog post as you write it.
Preview Button – This is where you can preview what your blog post will look like on your website before you publish it.
Status – This will show you the status of your post and is also where you can edit the status. Your options are ‘draft’ or ‘pending review’ by an administrator before you post.
Visibility – This is where you manage how your post will be viewed. Public means that it will be viewable by everyone who comes to your site. You also have the option of marking it private or password protecting it if you want to limit who sees it.
Publish – Finally, when you are ready to publish your post you can click the Publish button or you can schedule it to be published at a date and time in the future.
Format
The next section is the format section. For a standard blog post you would leave this as marked ‘standard’.
Categories and Tags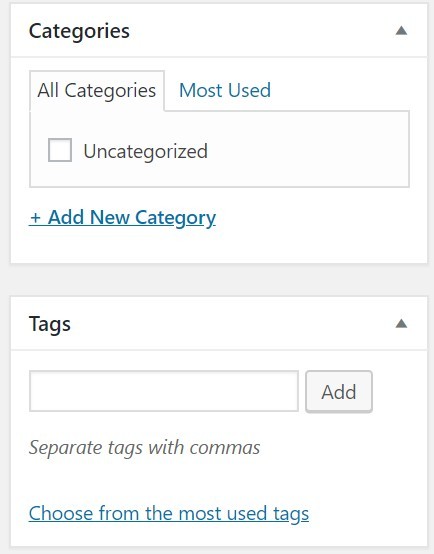

Here you can add categories and tags to your blog post. Categories and tags are ways in which you can organize posts on your site so your readers can easily find your content.
Categories are the general categories that your content can be categorized in. Most bloggers use between 7-10 categories to categorize their content. Tags are more like micro-categories and are similar to including index entries for a page. Posts with similar tags are linked together when a user clicks on a tag.
Featured Image
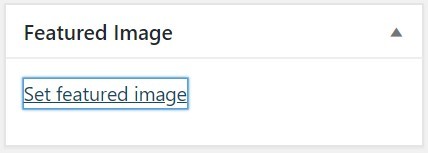 This is where you can set a featured image for your post. It will be the representative photo that will show up with your blog post on your website. Setting the featured image is pretty simple. It’s basically the same as adding media to your blog post.
To set your featured image click on ‘Set featured image’. It will take you to your media library where you can choose from a previously uploaded image or you can upload an image from there. Choose your image and click ‘set featured image’ again. Then you will want to either click ‘save draft’ or ‘publish’ in order to save it.
The SEO Stuff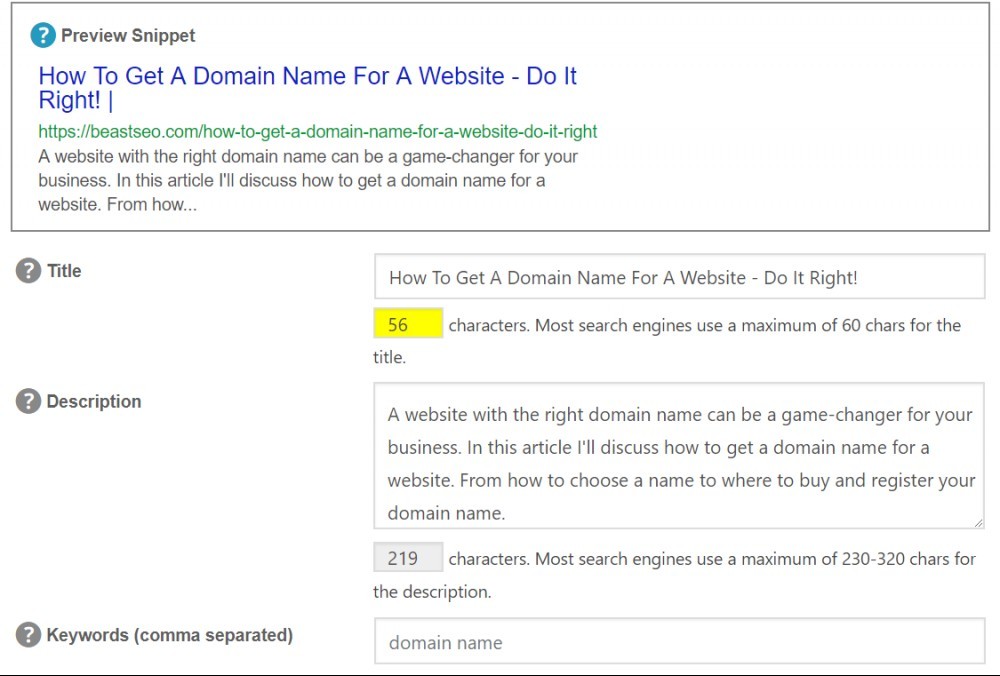
The last thing you will want to do before you publish your post is to make sure that the search engines like Google and Bing can find your article. SEO stands for search engine optimization and is the stuff that helps your blog post get found. Just below the main content area of your post you will find your SEO information IF you have an SEO plugin (like Yoast SEO or All-In-One SEO Pack) installed. If you do not have one of those installed I highly recommend that you do.
The image to the right will show you what your SEO area will look like. It will show you a Preview Snippet of what your post will look like when it shows up on the search results on Google or Bing. The title and description are key when search engines are looking for your content. Make sure they are filled in. Some SEO plugins will auto-populate the title and description fields for you. If not, you can fill them in using the title of your post and a relevant description of what your blog post is about. You can also add a few keywords that are relevant to your post in the ‘keywords’ area if you’d like. There is no need to fill in anything else.
Now You’re Published!
Once you are happy with the way your blog post looks, you’ve added your categories, tags and your featured image, and filled in your SEO information, you are ready to publish. If you’re like me, you’ll check and double-check to make sure you don’t have any spelling errors and that your post looks visually appealing. Then, click on the Preview button to make sure it looks the way you want. All good? OK, click Publish!
Congratulations! You’ve added a blog post in WordPress. Let me know if this article was helpful or if you have any comments. Thanks!